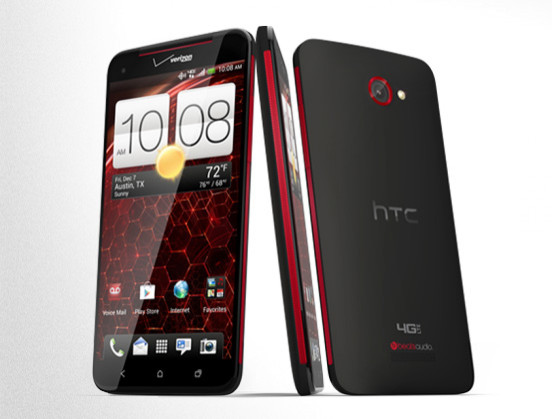
HTC Droid DNA: How To Unlock The Bootloader [Tutorial]

With its impressive high resolution screen (1080 x 1920 pixels) and a powerful 1.5 GHz quad-core processor, HTC’s new smartphone, the Droid DNA, is a powerhouse performer in its true sense. With that in mind, it doesn’t come as a surprise that the device has grabbed the attention of many developers out there.
During the announcement of Droid DNA, it was found that the device’s bootloader was unlockable at HTCdev.com, which subsequently made it possible for the device to get root, recovery and custom kernel even before the official release.
However, by the time Droid DNA became available in the market, Verizon reportedly “pulled the plug” and the device was not unlockable through HTC’s official tool any more. But the developer community was still in action, looking for some other way-out. And as Justin Case of Android Police noted, “There's another way.”
Case released a “softmod” that, he claimed, “will effectively change the carrier information, allowing it to once again be unlocked via HTC's official tool.” He also thanked Sean Beaupre, a member at XDA Developers, “who stepped in at the last minute and made this release possible.”
“I was unable to release one of the original exploits due to a conflict of interest, and Sean provided a working replacement that we could release,” Case added.
Below are the instructions to unlock HTC Droid DNA’s bootloader, provided by Case. But before going ahead, the users must note that the process involves serious modifications to the phone. If the steps are not followed properly, there are chances that the device could get bricked. IBTimes will not be held responsible for anything goes wrong. Users should proceed at their own risk.
What You Need
- backup.ab
- DNA_TeamAndIRC.zip
[For all the needed files, refer to the source link at the bottom]
- Windows/Linux PC with ABD for ICS or above configured
- 1GB of free space in the device’s internal memory
- At least 50 percent charge on the phone’s battery (full is recommended)
Method
Step 1: Download backup.ab and DNA_TeamAndIRC.zip.
Step 2: Extract the contents of DNA_TeamAndIRC.zip, and place the runme.sh, CIDGen.apk and backup.ab files in the same directory where ADB is installed.
Step 3: Launch a command prompt or terminal instance and run the following command:
adb install CIDGen.apk
Step 4: Run the CIDGen app from the phone and follow the directions on the app. After that, ensure the /sdcard/CIDBLOCK.img file exists on the phone using the following command:
adb shell ls -l /sdcard/CIDBLOCK.img
Step 5: If CIDBLOCK.img does not exist after running the app, do not proceed. Try re-running CIDGen.apk on the phone again, and then re-run the above command to verify CIDBLOCK.img's existence.
If the file does exist, run the following commands in terminal or CMD:
adb push runme.sh /data/local/tmp/
adb shell chmod 755 /data/local/tmp/runme.sh
adb shell /data/local/tmp/runme.sh
This process will loop forever and will continue giving out lots of "No such file" or "link failed" errors. Leave it running.
Step 6: Open a second terminal or command prompt and restore the modified backup using the following command:
adb restore backup.ab
After running this command, the phone will ask for permission to restore the file, so go ahead and allow it.
Step 7: After the process is finished, stop the first command prompt by closing the window. This will kill the runme.sh script.
Step 8: In the second command prompt window, run the following set of commands.
Note that any interruption at this point – reboot, disconnection from PC or power off – will permanently brick the device.
adb shell rm /data/data/com.htc.usage/files/exploit/*
adb shell mv /data/DxDrm /data/DxDrm_org
adb shell mkdir /data/DxDrm
adb shell ln -s /dev/block/mmcblk0p5 /data/DxDrm/DxSecureDB
adb reboot
adb wait-for-device
Step 9: Repeat the runme.sh script again with the following command:
adb shell /data/local/tmp/runme.sh
This process will also loop forever and give out lots of "No such file" or "link failed" errors – again. Leave it running.
Step 10: Open another terminal or command prompt window and restore the modified backup once again using the following command. After running this command, the phone will ask for permission to restore the file, go ahead and allow it.
adb restore backup.ab
Step 11: Once the process is finished, stop the runme.sh exploit by closing the previous window and run these commands:
adb shell mv /data/DxDrm /data/DxDrm_trash
adb shell dd if=/sdcard/CIDBLOCK.img of=/dev/block/mmcblk0p5
adb reboot
[Source: Android Police]
After this reboot, Droid DNA’s carrier information should be changed, allowing you to unlock it through HTCDev.com.
For more information on recovery, root and support thread for the unlock, visit the HTC Droid DNA forums on RootzWiki.
© Copyright IBTimes 2024. All rights reserved.


