Android 4.3 Jelly Bean Update: Test Firmware For Samsung Galaxy Note 2 GT-N7100 Leaked; How To Install [Tutorial]

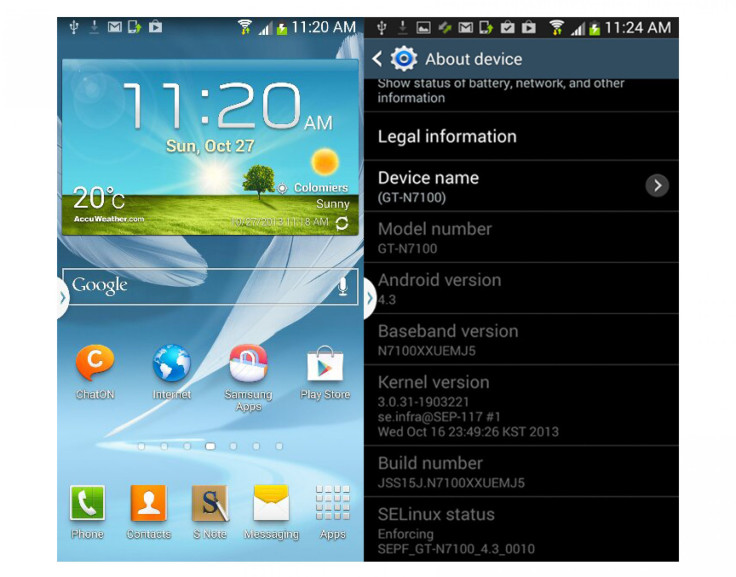
A new Android 4.3 Jelly Bean test firmware was leaked for the Samsung (KRX:005935) Galaxy Note 2 with the model number GT-N7100 on Saturday, while an official rollout of the update is yet to take place.
In the Android 4.3 Jelly Bean update (N7100XXUEMJ5), Samsung has updated the core user interface elements to resemble the interface on the Galaxy S4 and the Galaxy Note 3. Features such as Samsung Knox and Samsung Wallet are also present in the leaked test firmware, according to a report from SamMobile.
The Android 4.3 firmware is currently under development, and Samsung is expected to officially release the update to both the Galaxy S3 and Galaxy Note 2 in November.
As the Android 4.3 firmware in question has not come from official sources, users can install it on their devices by performing a manual installation. However, it should be noted that the N7100XXUEMJ5 Android 4.3 firmware is a pre-release version, and may include bugs that would possibly be ironed out before the final version of the software reaches users.
Now, check out the manual installation tutorial for installing the Android 4.3 Jelly Bean test firmware on the Samsung Galaxy Note 2 (GT-N7100).
Vital Points To Note
- Make sure that you have proper backup for data.
- The Samsung Galaxy Note 2 should have at least 80 percent battery power.
- The USB drivers for the device must be installed on the computer. [Download]
- Enable USB Debugging.
- After flashing the firmware, you will lose custom ROMs installed in your device.
- You will also lose custom recovery if you have any.
- After installing it on your Galaxy Note 2, you will lose the root if you have any as the N7100XXUEMJ5 is an official firmware.
- The process is meant only for the Samsung Galaxy Note 2 (GT- N7100).
- The firmware will not increase your binary counter nor void your warranty.
NOTE: International Business Times will not be responsible for anything that goes wrong. Users should proceed at their own risk.
Tutorial
Step 1: Download the updated firmware package and extract the zip file.
Step 2: Download Odin v3.09 and extract the zip file.
Step 3: Switch off the phone and put it on the Download Mode. To do this, press Volume Down + Home + Power buttons and then press Volume Up when the warning message appears.
Step 4: Open Odin v3.09.exe as an Administrator.
Step 5: Connect the Galaxy Note 2 to your computer via the USB cable while in the Download mode, and wait until you get a blue sign in Odin.
Step 6: In Odin, click on PDA and select the .tar.md5 file that you have extracted from the Firmware Package in Step 1.
Step 7: In Odin, select the Auto Reboot and F. Reset Time options, but make sure that the re-partition checkbox is not selected.
Step 8: Click on the Start button in Odin to begin the installation process.
Step 9: Once the installation is complete, the device will reboot on its own. Once you get the Samsung logo on the home screen, unplug the device from the computer and close Odin.
If users face any issues with the firmware, such as FC errors and Bootloop errors, the device should be booted into recovery mode (Home + power + volume up), and then choose to wipe/factory reset. Users should note that it will erase all of their data, including those on the internal SD card. After doing this, users should reboot the phone.
[Source: SamMobile, Team Android]
© Copyright IBTimes 2024. All rights reserved.


