Android 4.4.2 KitKat XXUFNB3 Official Firmware Released For Samsung Galaxy S4 (GT-I9500): How To Install It Manually [Tutorial]

The Exynos 5 Octa-powered Samsung Galaxy S4 with the model number GT-I9500 started receiving the latest Android 4.4.2 KitKat official firmware update on Thursday. Although the update is being rolled out in phases beginning in Russia, users from other regions can also download the firmware and install it manually on their devices.
To update the Galaxy S4 to Android 4.4.2 KitKat -- version I9500XXUFNB3, users can download and install the firmware over-the-air by going to Settings > More > About Device > Software update. However, to update the handset manually, users are required to download the firmware from the links below. The update is 1.5 GB in size.
Here are the firmware details of the Android 4.4.2 KitKat for the Samsung Galaxy S4 GT-I9500:
Model: GT-I9500
Country: Russia
Version: Android 4.4.2
Changelist: 699287
Build date: Thu, 13 Feb. 2014
Product Code: SER
PDA: I9500XXUFNB3
CSC: I9500SERFNB3
MODEM: I9500XXUFNA6
Download Links: Samsung-Updates, SamMobile
Before performing a manual installation, users should be aware of certain aspects:
- All data should have proper back-up.
- The handset must have at least 80 percent battery power.
- The USB drivers for the device must be installed on the computer and USB Debugging must be enabled.
- After flashing the firmware any installed custom ROM will be lost.

Note: International Business Times cannot be held responsible for anything that goes wrong. Users should proceed at their own risk.
Tutorial
Step 1: Download the firmware package and Odin v3.09, and extract the zip files.
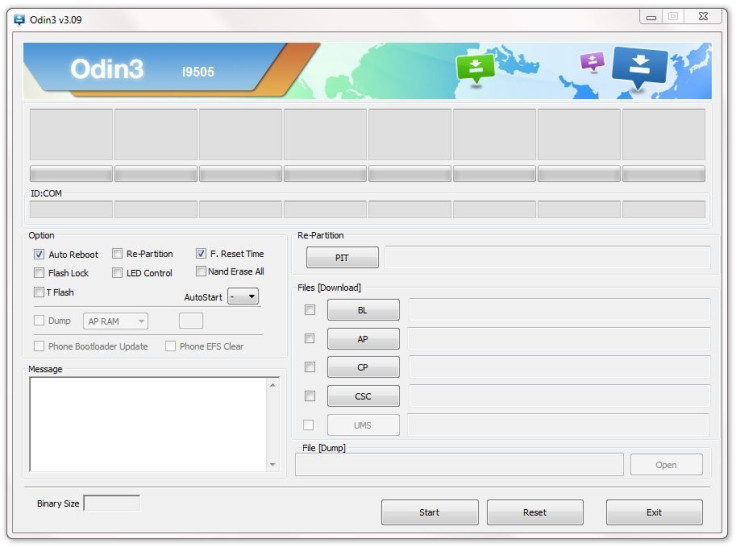
Step 2: Run Odin3 v3.09 as an Administrator.
Step 4: Switch off the Galaxy S4 and put it in Download Mode. To do this, press Volume Down + Home + Power buttons.
Step 5: Connect the Galaxy S4 to the computer via the USB cable while the phone is in the Download mode. Wait until a blue sign appears in Odin.
Step 6: Click on the AP button in Odin and select the .tar.md5 file that was extracted in Step 1.
Step 7: In Odin, select the Auto Reboot and F. Reset Time options, but make sure that the re-partition checkbox is not checked.
Step 8: Now, click on the Start button in Odin to begin the installation process.
Step 9: Once the installation is complete, the device will restart and a PASS message will appear in the left-most box at the top of Odin.
Step 10: Once you get the Samsung logo on the home screen, you can unplug the device from the computer and close Odin.
[Source: SamMobile]
© Copyright IBTimes 2024. All rights reserved.


