Evasi0n Released: How To Jailbreak iOS 6, 6.0.1, 6.0.2, 6.1 Untethered On iPhone 5 And Other Devices [Tutorial For Mac, Windows]

Thanks to the iOS hackers, who clubbed together to form the team evad3rs and worked rigorously to develop a tool to set millions of iOS devices free from factory-imposed limitations, the long sought-after iOS 6, 6.1 untethered jailbreak evasi0n finally got released Monday on all the three major platforms – Mac OS X, Windows, and Linux.
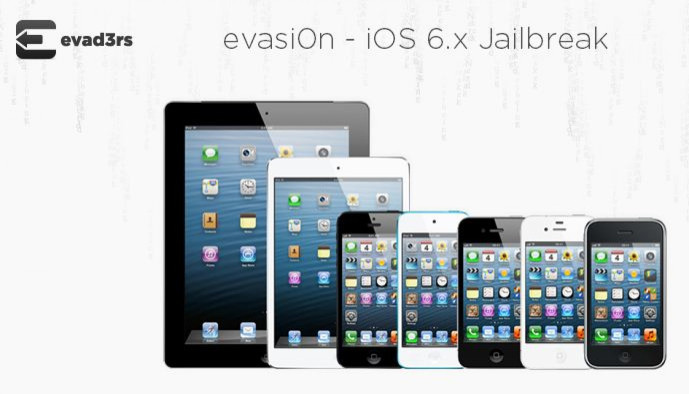
Evasi0n is compatible with all iOS 6 flavors, including iOS 6.0, 6.0.1, 6.0.2, and 6.1. The new untethered jailbreak tool supports every iOS device (excluding Apple TV 2 and Apple TV 3) that is capable of running iOS 6 and above. Below is a list of all the supported devices:
- iPhone 5, iPhone 4S, iPhone 4, iPhone 3GS
- iPad 4, iPad 3, iPad 2, iPad mini
- iPod touch 4, iPod touch 5
Although evasi0n works on any iOS 6 firmware – iOS 6.0 through 6.1, it’s still recommended to upgrade the device to iOS 6.1 version before trying out the jailbreak so that you don’t miss out of the new features of Apple’s latest firmware update.
In addition, the users are also recommended not to update their devices over the air (OTA) if they are willing to jailbreak. Instead, they can download the iOS 6.1 firmware and update via iTunes to avoid any issues.
Prerequisites
- A computer running at least Windows XP or above, Mac OS X v10.5 or above, Linux (x86 / x86_64)
- An iOS device running iOS 6.0 through 6.1 (Check the version in Settings / General / About => Version)
- A USB cable to connect the device to the computer
Note
- Backup your device using iTunes (or iCloud) before using evasi0n
- Disable the lock passcode of your iOS device before using evasi0n to avoid unwanted issues
- Avoid all iOS and iTunes related tasks until evasi0n is done with the jailbreak
If the process gets stuck somewhere, you can restart the program, reboot the device (by holding down Power and Home until it shuts down) and rerun the process.
In case you get an error on OS X 10.8 saying that evasi0n can't be opened, control-click (or right-click) the app and on the revealed context menu, choose “Open.” On the ensuing dialogue box, choose “Open” as well.
The following tutorial is meant for Mac OS X and Windows users. It should be noted that while most of the steps for both the platforms are similar, there are a few instances where they differ. Therefore, the users should follow the steps very carefully.
Two video tutorials have also been added at the bottom for Mac and Windows users respectively.
Let’s get started now.
Step 1: Download evasi0n for your OS (Windows / Mac / Linux) and extract the package. Windows user can save it on their desktop.
Step 2: Mac users should double click on the evasi0n app to run it.
Windows user should right click on the vasi0n.exe file and select “Run as administrator.” Click on “Yes” if a User Access Control window appears.
Step 3: If you have set a passcode on your device, disable it. To do this, go to Settings > General > Passcode Lock > and select Turn Passcode Off.
Step 4: Connect the device to your computer via USB cable.
Step 5: If connected properly, evasi0n will show a message that it has detected the device. After the device gets detected, the Jailbreak button will become active.
Step 6: Now, click on the Jailbreak button to start the process.
Step 7: A number of automatic steps will follow, including preparing jailbreak data, injecting jailbreak data, rebooting the device, uploading Cydia, and uploading the Cydia packages list. It will take some time. So wait for evasi0n to complete its task.
Step 8: Once done, a new screen will pop up asking you to unlock your device. After you unlock the device, a new app icon named “Jailbreak” will appear on the Home screen. Tap the icon only once, and the screen will go back and return to the Home screen instantly.
Step 9: Now you will get some messages like injecting jb data, and Root Filesystem successfully remounted on the evasi0n tool. During this stage, your device may reboot multiple times. Sit back and wait.
Step 10: After the jailbreak is finished, a “Done!” message will appear. The device will now reboot. The first boot may take some time. The device might restart several times, so don’t panic.
Step 11: For Mac users, the device will display a large Evasi0n logo on a white background. You will also get some brief messages like “Setting up fstab and AFC2,” “Setting up Cydia,” “Setting up Cydia packages,” “Clearing SpringBoard Cache” and “Rebooting.”
After some blinker, the device will reboot one last time. Once done, you will again get the white evasi0n screen with another set of messages including “Initializing offsets” “Finding offsets,” “Patching kernel,” “Cleaning up” and “Done! Continuing boot.”
After this, you will be on your Lock screen. The jailbreak process is now complete. Swipe over to the second Home screen to find the Cydia icon.
For Windows users, once you are done with Step 10, a large evasi0n logo will show up on the device screen. The logo will blink once or twice and then will stay on for a bit longer.
After that, you will be on the device’s Lock screen. Slide to Unlock the device and the Cydia icon will be there on the device’s second Home screen.
[Source: iDownloadBlog – Mac, Windows]
Check out the videos below:
Mac OS X
Windows
MUST READ:
- Evasi0n Untethered Jailbreak Issues: How To Manually Fix Weather App Crashing Bug On iPhone
© Copyright IBTimes 2024. All rights reserved.


